Cordova and Eclipse on Windows: Make Android Apps
Eclipse is no longer the proper tool for this, use Android Studio instead Eclipse is no longer the proper tool for this, use Android Studio instead Eclipse is no longer the proper tool for this, use Android Studio instead
This is a guide on how to setup a development Virtual Machine that uses Cordova and Eclipse to make Android Apps on Windows 7. You will be able to run this Windows VM from Windows, Linux, and maybe even Mac.

Installation
You should already have installed Windows 7 x86 (32-bit) Professional/Ultimate in a Virtual Machine.
Setup
- VM: Virtualbox 2048MB RAM
- OS: Windows 7 x86 (32-bit only!) Professional/Ultimate
- Cordova version: 3.5.0
- Android SDK/ADT version: 22.6.4
- Eclipse ADT bundle version: x86-20140321
This setup has a lot of prerequisites but is the easiest setup method I have found for these tools.
Install Java JDK 7
You will need to install Java SE Development Kit 7. At the time I wrote this, version 8 is out, but I am using version 7u60 as per Google guidelines.
Java JDK 7 Download Page: [1]
Setting Java into Path and JAVA_HOME

You now need to make environment variables (system). Right click "My Computer" and go to properties. Click "advanced system settings" then click the "advanced" tab. Click the "environment variables" button and create a new system variable.
Variable Name: JAVA_HOME
Variable Value: C:\Program Files\Java\jdk1.7.0_60
Now edit the system variable "Path" and add this to the end (do NOT delete current contents!):
Variable Name: Path
Append this to Value:
;C:\Program Files\Java\jdk1.7.0_60\bin
Apache ANT Installation
Apache ANT is required for Cordova.
Download Page: http://ant.apache.org/bindownload.cgi
- Download Apache ANT (for me it is v1.9.4)
- Unzip the .zip into any folder (c:\Android\apache-ant-1.9.4)
Adding ANT to the Path Variable
Right click "My Computer" and go to properties. Click "advanced system settings" then click the "advanced" tab. Click the "environment variables" and double click the system variable "Path" and add this to the end of the line (do not delete contents!)
;C:\Android\apache-ant-1.9.4\bin
Setup Apache Cordova
Cordova is the core of our setup to create Android apps. Cordova is a set of command line tools that will create a skeleton app with a given name, folder, and package name. It creates this skeleton app so we can import it into Eclipse and edit as we like.
Install Node.js
You will need this for downloading Cordova CLI tools.
Download Page: http://nodejs.org/
Install Git
You will need Git for Cordova to pull files during the build.
Download Page: http://www.git-scm.com/download/win
During Git Setup Choose: Use Git from the Windows Command Prompt
During Git Setup Choose: Checkout Windows Style
Download and Install Cordova using npm

This will download and install (-g means globally) Cordova using the Node.js
npm install -g cordova
Android SDK
Download the latest Android SDK + Eclipse ADT bundle from the official website: http://developer.android.com/sdk/index.html
- unzip the SDK + ADT Eclipse .zip file after download (my version adt-bundle-windows-x86-20140321)
- put the "sdk" folder in C:\Android
- Put the "eclipse" folder in C:\Android (We will setup Eclipse in the next step)
- Put "SDK Manager.exe" in C:\Android
Update Android SDK

The SDK Manager is an update tool for some of the requirements to build Android apps.
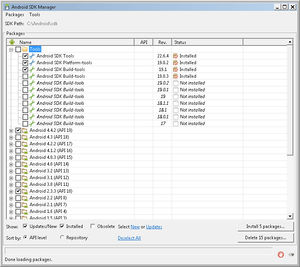
- Open SDK Manager and check these items to install/update:
- Android 4.4.2 (API-19) for download (or most recent version)
- Android 2.3.3 (API-10) for download (if you want to test on older devices)
- Android SDK Tools
- Android SDK Platform-Tools
- Android SDK Build Tools
Add Android SDK to Path
Again we will be editing the Path variable in Windows.
- Right click "My Computer" and go to properties. Click "advanced system settings" then click the "advanced" tab. Click the "environment variables" and double click the system variable "Path" and add this to the end of the line (do not delete contents!)
;C:\Android\sdk\platform-tools;C:\Android\sdk\tools
Create Android Virtual Device AVD
This will create a virtual Android on your computer that will run the apps we make so we can test them before compiling. I use 2 devices, one with the latest Android (4.4.2) and one with the oldest Android I will support (2.3.3)
- Open C:\Android\AVD Manager.exe
Create AVD for Android 2.3.3

- click New
- AVD Name: and233
- Device: Nexus 7 (800x1280) --- This is a personal preference, what resolution you want to test at
- Target: Android 2.3.3 API Level 10
- CPU: ARM (armeabi)
- Skin: skin with dynamic hardware controls
- RAM: 1024
Create AVD for Android 4.4.2
- click New
- AVD Name: and442
- Device: Nexus 7 (1200x1920) --- I chose a higher resolution device to test this more recent version of Android
- Target: Android 4.4.2 API Level 19
- CPU: ARM (armeabi-v7a)
- Skin: skin with dynamic hardware controls
- RAM: 1024 (lowered from 2048 default)
Setup Eclipse
Eclipse is the IDE we will be using during development to compile and sign apps. We already downloaded and unzipped the Eclipse+ADT bundle in an earlier step to C:\Android\eclipse
- Open eclipse.exe
- Make a new workspace when prompted in C:\Android\eclipse-workspace
- Check sdk location in eclipse - Windows > Preferences > Android > SDK Location
- C:\Android\sdk
- Test SDK load in Eclipse -- Window > Android SDK Manager
- You should see all of the downloads we did earlier as "Installed"
We should now be fully setup to work with apps using Cordova and Eclipse. You may need to follow additional steps to build your first project, it can be tricky.
Create App with Cordova and Eclipse
Cordova is the command line tools for creating a skeleton Android app. These commands build the skeleton that Eclipse will import.
Cordova create

Open your Android folder at C:\Android in a command prompt
mkdir Projects   (we will use this as our Cordova Project folder)
cd Projects

Create the app- hello is the folder to be made, com.example.hello is package name, HelloWorld is app name
cordova create hello com.example.hello HelloWorld
cd hello

Add Android as a platform so we can import
cordova platform add android
Build the app skeleton
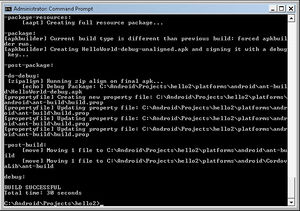
cordova build
Cordova.jar creation

You will need to build cordova.jar in order for the app to work.
- Download the latest Cordova Android Zip: https://www.apache.org/dist/cordova/platforms/
- My version is cordova-android-3.5.0.zip
- Unzip the folder "cordova-android" into our cordova project directory C:\Android\Projects
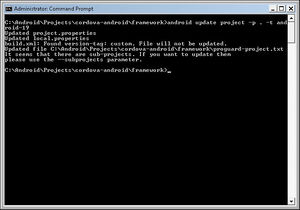
- Open a command prompt to C:\Android\Projects\cordova-android\framework and run these commands (replace android-19 with latest ver):
android update project -p . -t android-19
ant jar
- you now have cordova-3.5.0.jar in the "framework" directory. We will use this for all projects, so copy it to c:\Android\Projects
Import App into Eclipse
The import process is easy to do wrong. Be careful with these steps, and make sure you have cordova.jar we made in the last step ready.
Import Cordova Skeleton into Eclipse

- File > New > Project
- Android > Android Project from Existing Code
- Root Directory: c:\Android\Projects\hello\platforms\android
- UNCHECK the project CordovaLib (we will use cordova.jar instead)
- DO NOT copy project into workspace (play with that later)
Eclipse src and gen folder
This will add the folders src and gen to the source list which is essential.
- Right click project > Properties
- Go to "Java Build Path" and select "Sources" tab
- If you see ONLY src and gen here, you can skip the rest of this step.
- Remove all entries in the Sources tab
- Click "Add Folder"
- Select the 2 folders, "gen" and "src"
Import Cordova.jar into Eclipse
This will allow the package to use Cordova functions. Obviously essential.
- Open an explorer window to c:\Android\Projects
- Drag the cordova.jar into Eclipse, in your working project, in the "libs" folder
- Choose the "Copy Files" option

Allow viewing of the assets/www folder
The www folder is hidden by default. Do not ask me why. Here is how to un-hide it.
- Right click project > Properties
- Resource > Resource Filters
- Select the line with assets/www in it. Remove it.
- Apply changes
You can now see the www files in the assets/www folder. This is where your future web code will go for Cordova apps.
Test Run App in Eclipse/AVD

The app is now complete and ready to be deployed to the simulator from Eclipse.
- Right click project > Run As > Android Application
- Your Android Virtual Device should open, and once unlocked will display the test app.
- You may choose to enable LogCat in Eclipse, it gives an error message tab for the simulator.
Export Cordova app to APK

If the app works how you want it to, you can export the app to an APK file now.
- Right Click the project in Eclipse > Export > Android > Export Android Application

- You will need to create a new key used to sign the app. If you lose this key you will never be able to update the app on Google Play!
- Backup this key in multiple places if this is a serious app!
- Create new keystore (choose location and name of key to create)
- Password
- You will need an Alias, password + confirm password, and validity years (I use 999). You need to set at least the country code for the key.
- Choose the destination where the .apk will be
You now have the APK file created using Cordova and Eclipse in Windows 7 x86
External Links
Links:
- http://cordova.apache.org - Cordova Homepage
Cordova Documentation:
- Cordova Documentation 3.5.0 - Command Line Interface
- Cordova Documentation 3.5.0 - Platform Guide - Android
Downloads:
- Apache.org - Download Cordova framework (not the cli tools!)
- http://nodejs.org/ - Node.js Homepage
- http://git-scm.com/ - Git Client
- Apache ANT - ANT Binary Downloads page
- Java - Java JDK Download (we use JDK 7)
- Android SDK - Android SDK + Eclipse + ADT bundle download